How to Build a WordPress Website for Your Online Business
In today’s digital age, having a website is essential for any business, startup, or personal project. A well-designed website not only lets you showcase your products or services to the world, but it is also a fundamental tool for attracting customers, building a brand, and generating trust. However, many people believe that creating a website is a complicated and expensive process. Fortunately, there is a platform that makes this process easier: WordPress.

In today’s digital age, having a website is essential for any business, startup, or personal project. A well-designed website not only lets you showcase your products or services to the world, but it is also a fundamental tool for attracting customers, building a brand, and generating trust. However, many people believe that creating a website is a complicated and expensive process. Fortunately, there is a platform that makes this process easier: WordPress.
WordPress is the world’s most popular content management system (CMS), used by millions of people and businesses to create all kinds of websites, from personal blogs to online stores. Its ease of use, flexibility, and the large number of available resources make it the ideal choice for those who want an online presence without needing advanced programming knowledge.
In this article, we will guide you step by step through the process of how to build a website with WordPress. We will teach you everything from planning and choosing the domain name and hosting, to installing, customizing, and optimizing your WordPress website. With this complete guide, you’ll be able to create a professional and functional website in no time, and you’ll be ready to share your content with the world. Let’s get started!

What is WordPress?
WordPress is a content management system (CMS, for its acronym in English) that allows you to create and manage websites intuitively and without the need for advanced technical knowledge.
Being open source, its source code is available to any user, allowing the community to continuously develop and share improvements, themes, and plugins. This feature has helped WordPress become the most widely used platform in the world for creating websites, powering more than 40% of all sites on the internet.
Differences Between WordPress.com and WordPress.org
There are two versions of WordPress, and it is important to know their differences in order to choose the one that best suits your needs:
- WordPress.com: It is a managed platform that offers hosting and maintenance, ideal for users looking for a simple, hassle-free solution. Here, you do not need to buy a domain or contract hosting separately. Although it is easy to use, its customization options are more limited, especially in the free version.
- WordPress.org: WordPress.org is the self-hosted version that allows you to install WordPress on your own server. It provides total control over the website, allowing the installation of any theme and plugin, as well as the ability to modify the code as needed. It is perfect for those who want to create a fully customized website with advanced features, such as online stores or corporate websites.
Advantages of Using WordPress: Flexibility, Customization, SEO, Community Support
WordPress has earned its popularity thanks to a series of advantages that make it stand out from other platforms:
- Flexibility: It allows you to create any type of website, from a simple blog to an online store or a complex corporate website.
- Customization: It offers thousands of themes and plugins that allow you to modify the design and functionality of the website. In addition, its modular structure makes it easy to integrate new tools and options.
- SEO optimized: WordPress is designed to be search engine friendly, making it easier to implement SEO strategies that improve the visibility of the website.
- Community support: The user and developer community is huge, which means there are always resources, tutorials, and forums available to solve questions or problems.
Types of Websites You Can Create with WordPress
WordPress is an extremely versatile platform, allowing it to adapt to different types of projects and needs. Some of the most common websites you can create are:
- Blogs: Perfect for those who want to share content regularly, whether personally or professionally.
- Online stores: With the WooCommerce plugin, WordPress allows you to create and manage a complete online store, with payment options, inventory, and product management.
- Portfolios: Ideal for artists, designers, or photographers who want to showcase their work professionally.
- Corporate websites: Businesses of all sizes can use WordPress to create their online presence, with sections for services, contact, and more.
- Educational sites: With specific plugins, you can create online course platforms with advanced functionality.
In short, WordPress is the ideal tool for anyone or any company that wants to create a professional and customizable website for your online business, taking advantage of all the benefits offered by its community and technical flexibility.

What Do I Need to Know to Start Using WordPress?
1. Determine the Type of Website You Want to Create
Before you start creating a website, it is essential to be clear about the type of site you want to develop. WordPress offers the flexibility needed to adapt to different projects, whether it is a blog, an online store, a professional portfolio, a corporate website, or even an educational platform.
Determining the type of website you need depends on the goal you want to achieve. For example, if you want to share content regularly and connect with an audience, a blog would be the best option.
If you want to sell products or services, then an online store is the way to go. For those who want to showcase their artistic or professional work, a portfolio is ideal, while a corporate website is perfect for businesses that want to establish a professional online presence.
2. Set Clear Goals for Your Website
Once you have defined the type of website you want to create, it is essential to set clear goals. Ask yourself what you want to achieve with your website: Are you looking to attract more customers to your business? Do you want to increase your online visibility? Or perhaps you want to monetize your content? Defining these goals will help you make strategic decisions throughout the creation and development process.
To begin, define the main purpose of your website. It may be to generate sales, capture leads, educate your audience, or simply share informative content. Then break that purpose down into specific and measurable goals.
For example, if you are creating an online store, your goals could be to increase traffic by 50% in the first six months or achieve 100 monthly sales. If it is a blog, you could set a goal of publishing two articles per week and getting 1,000 monthly visits.
Finally, make sure these goals are aligned with the theme and content of your website. A well-defined purpose will not only guide the design and structure of the page, but also the marketing and promotion strategies you will implement to achieve your goals.
Planning ahead and having a clear focus from the start will allow you to make the most of the possibilities WordPress offers to create a successful website and meet your project goals.

Choose a Domain Name and Hosting Provider
1. Tips for Selecting a Good Domain Name
Choosing the right domain name is a crucial step for the success of your website, since it will be the identity of your online page. For a domain name to be effective, it should be simple, relevant, and easy to remember.
It is recommended that it be short, avoiding complex or hard-to-spell words. Using keywords related to the content or theme of your website can help improve its ranking in search engines. For example, if your project is a shoe store, a domain like «zapatosonline.com» could be more effective than a more generic name.
In addition, it is important to verify that the domain name is available and not already registered by another person or company. Tools like Namecheap or GoDaddy allow you to quickly search and check availability. It is also advisable to choose a domain with an appropriate extension, such as «.com» for global sites, «.es» for Spain, or «.org» for organizations. This will help define the purpose and scope of your site.
2. Recommendations for Reliable Hosting Providers Suitable for WordPress
The hosting provider is responsible for storing all the files of your website and making it available on the internet. Choosing a good web hosting service is essential to ensure the performance and security of your page. For WordPress websites, some of the most recommended providers are:
- SiteGround: SiteGround is known for its excellent technical support and speed. It offers WordPress-specific plans, including security tools and automatic backups.
- Bluehost: Bluehost is one of the most popular providers, officially recommended by WordPress. It is ideal for beginners because of its ease of use and competitive pricing.
- Hostinger: Hostinger offers affordable plans with good value for money. It is known for its performance and multilingual support.
These providers offer intuitive control panels, 24/7 technical support, and scalability options, making it easier to manage and grow your website.
Process for Registering Your Domain Name and Hiring Web Hosting
Registering a domain name and purchasing hosting is a simple process that can be completed in a few steps:
- Choose and verify the domain name: Use a domain registrar such as Namecheap, GoDaddy, or the hosting provider itself to check the availability of the desired name.
- Select a hosting plan: Depending on your project’s needs, choose a hosting plan that offers enough storage space, bandwidth, and additional features such as SSL certificates and email accounts.
- Register the domain and purchase hosting: Complete the purchase and registration process. Some providers, such as Bluehost, offer free domain registration when you purchase a hosting plan.
- Configure the domain in hosting: If you bought the domain separately, you will need to configure it so it points to your hosting provider’s servers. This is done from the domain provider’s control panel.
- Install WordPress: Most hosting providers offer one-click automatic WordPress installation from the control panel. Once installed, you will be ready to start customizing your website with WordPress.
With these steps, your website will be ready to start taking shape and receiving visitors.

WordPress Installation
How to Perform Automatic Installation from the Hosting Provider’s Panel
Installing WordPress automatically is the easiest and fastest way to start creating your website. Most hosting providers offer an automatic installer that makes this process easy. To carry out this installation, follow these steps:
- Access your hosting control panel: Log in to the web hosting provider’s control panel you have hired. This panel, commonly known as cPanel or similar, is where all your hosting functions are managed.
- Find the application installer: Most hosting providers have an application installer that allows you to install WordPress with one click. Look for options such as «Softaculous», «WordPress Installer», or «AutoInstaller».
- Select WordPress: Click on the WordPress option. You will then be asked to complete some basic fields, such as the domain name where WordPress will be installed, the installation path (if necessary), and the site language.
- Complete the setup information: Enter the username and password for the site administrator, as well as a valid email address. These details will be needed to access the WordPress admin panel.
- Start the installation: Click «Install» and wait for the process to finish. In a few minutes, you will receive a confirmation message with the access details for your new WordPress website.

Guide to Manually Installing WordPress
Manual WordPress installation requires a few additional steps, but it is useful for those who want greater control over the process:
- Download WordPress: Visit the official WordPress.org website and download the latest version of the software in ZIP format.
- Upload the files to your hosting: Use an FTP client such as FileZilla to upload the unzipped files to the root folder of your domain on the web hosting server.
- Create a database: From your hosting control panel, go to the «Databases» section and create a new database along with a user. Save the database name, username, and password, as you will need them later.
- Configure the wp-config.php file: Rename the file «wp-config-sample.php» to «wp-config.php» and open it for editing. Enter the database details you created earlier.
- Run the installation: Access your domain URL in the browser and follow the on-screen instructions to complete the WordPress installation.
Initial WordPress Setup
Once WordPress is installed, it is important to perform an initial setup to customize your site:
- Select the language: When logging in for the first time, choose the language in which you want to manage your site. This option can be changed later from the control panel.
- Set the username and password: Make sure the administrator username and password are secure. Use combinations of letters, numbers, and special characters to protect your site.
- Set an administrator email: This email will be used to receive important notifications, such as security alerts and updates.
- Customize the site title and description: From the control panel, go to «Settings > General» to enter your site name and a short description.
- Configure permalinks: In «Settings > Permalinks», select the URL structure you prefer for your site, optimizing it for SEO.
With these steps completed, you will have installed and configured WordPress correctly, ready to start customizing and adding content to your website.

Select and Install a Suitable Theme
1. Differences Between Free and Paid Themes
When creating a website in WordPress, one of the first steps is to choose a suitable theme that determines the appearance and functionality of your site. There are two main types of themes: free and paid.
Free themes: Free themes are available in the official WordPress repository. They are an excellent option for those who are just starting out and want to explore different designs at no cost. Although they usually have an attractive and basic design, their customization options and technical support may be limited. In addition, they may lack frequent updates and some advanced features.
Paid themes: Also known as premium themes, they offer greater flexibility, customization, and technical support. They usually come with advanced features, such as page builders, multiple design options, and compatibility with specific plugins. In addition, they usually include regular updates, ensuring that the theme remains secure and compatible with the latest versions of WordPress. Although they require an initial investment, their quality and support can be beneficial for professional or business websites.
How to Choose a Theme That Fits Your Website’s Topic
Choosing the right theme for your website is crucial to reflect your project’s identity and provide a good user experience. Below are some tips for selecting the right theme:
- Define your site’s topic: Before choosing a theme, it is important to be clear about the purpose and topic of your website. If you are creating a personal blog, look for a clean theme focused on readability. For an online store, make sure the theme is compatible with WooCommerce. If your project is a corporate website, look for a professional and modern design.
- Review functionality and compatibility: Make sure the theme supports the features you need, such as social media integration, contact forms, or image galleries. Also check that it is compatible with the plugins you plan to use and that it adapts to different devices with a responsive design.
- Customization and design options: Choose a theme that allows you to customize colors, typography, and layout without having to touch the code. Doing so will allow you to adapt the design to your brand identity and the type of content you want to display.
- Support and updates: If you opt for a paid theme, check whether the developer offers technical support and regular updates. This is crucial to maintain the security and proper functioning of your website.
Process for Installing and Activating a Theme in WordPress
Installing and activating a theme in WordPress is a simple process that can be done in a few steps from the control panel:
- Access the control panel: Log in to your website’s admin area and go to the «Appearance» section in the side menu. Then select «Themes».
- Add a new theme: Click «Add New» to access the WordPress theme repository. Here you can search for free themes by keyword, features, or popularity. If you have purchased a paid theme, click «Upload Theme» and select the .zip file from your computer.
- Preview and activate: Once you find a theme you like, you can preview it to see how it would look on your site. If you like it, click «Activate» so it is applied immediately to your website.
- Customize the theme: After activating the theme, go to the «Customize» section under «Appearance» to adjust colors, typography, menus, and other elements according to your needs.
With these steps, you will have selected and installed a suitable theme for your WordPress website, achieving a professional appearance consistent with your project’s theme.
Customize Your Website Design
1. Using the WordPress Customizer to Modify Design, Colors, and Typography
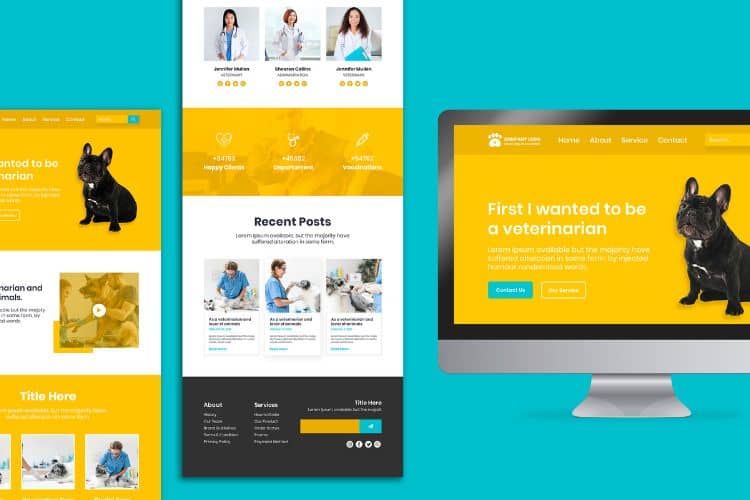
The WordPress Customizer is a very powerful tool that allows you to modify your website’s design in real time. To access this tool, go to your site’s control panel and select «Appearance > Customize». Here you will find a series of options that allow you to adjust various aspects of your website, such as colors, typography, and the overall structure of the site.
Colors and typography: You can choose a color palette that aligns with your brand identity, modifying background tones, link colors, and other visual elements. In addition, you can select the fonts that will be used in headings and body text, making sure they are readable and consistent with your site’s style.
Layout and arrangement: Depending on the theme you are using, you will be able to adjust the arrangement of sections on the homepage, the location of the sidebar, and the width of the columns. You can also choose from different page templates to apply to specific sections of the site, such as the blog or contact page.
2. How to Add and Organize Images on Your Homepage and Other Sections
Images play a fundamental role in the design of any website, as they can visually enhance content and capture visitors’ attention. To add images to your homepage and other sections, follow these steps:
- Upload images to the media library: Go to «Media > Add New» in the WordPress control panel and upload the images you want to use. Make sure the images are optimized for the web so they do not affect the site’s loading speed.
- Add images to the homepage: If your theme includes a visual builder, such as Elementor or Gutenberg, you can drag and drop image modules into the desired sections of the homepage. Adjust the size and position of each image according to the layout you planned.
- Image galleries and carousels: Use specific plugins or the Gutenberg gallery block to display multiple images in a single section. This is especially useful for portfolios or for showcasing featured products.
3. Navigation Menu and Widgets Setup
The navigation menu is an essential element for guiding visitors through your website. To configure it, go to «Appearance > Menus» in the control panel. Here you can create a new menu, add pages, custom links, and categories, and organize the order in which they appear. Make sure the menu is clear and easy to use, facilitating access to the most important sections of your site.
Add widgets: Widgets are small applications that you can add to specific areas of your theme, such as the sidebar or footer. To configure them, go to «Appearance > Widgets». Here you will find options to add text widgets, images, subscription forms, social media links, and much more. Drag and drop the widgets into the available areas of your theme to further customize your site.
With these customizations, you will achieve a unique and functional website design, aligned with your brand identity and optimized to provide a satisfying user experience.

Add Additional Functionality with Plugins
1. What Plugins Are and How to Install Them from the WordPress Repository
Plugins are additional tools that can be added to your WordPress website to extend its functionality. From improving security and optimizing SEO to adding image galleries or contact forms, plugins allow you to customize your site without needing advanced programming knowledge. In the official WordPress repository there are thousands of free and paid plugins that you can install with just a few clicks.
To install a plugin from the WordPress repository, follow these steps:
- Access the control panel: Log in to your WordPress website and go to the admin panel.
- Go to the plugins section: Click «Plugins» in the side menu and then «Add New».
- Search for the desired plugin: Use the search bar to find the plugin you need, either by typing its name or a keyword related to the functionality you want to add.
- Install the plugin: Once you find the plugin, click «Install Now». After a few seconds, the «Activate» button will appear. Click it to activate the plugin on your website.
2. Recommendations for Essential Plugins: Security, SEO, Speed Optimization, etc.
There are some plugins considered essential for any WordPress website, as they improve performance, security, and visibility in search engines. Below are some recommendations:
- Security:
- Wordfence Security: Provides protection against malicious attacks, malware scanning, and firewall.
- Sucuri Security: Offers security audits and site activity monitoring.
- SEO:
- Yoast SEO: Yoast SEO helps optimize content for search engines, makes sitemap creation easier, and provides recommendations to improve the SEO of each page.
- Rank Math: An alternative to Yoast, with advanced SEO analysis tools and customization options.
- Speed optimization:
- WP Super Cache: Generates static HTML files to speed up page loading.
- Smush: Optimizes your site’s images so they take up less space without losing quality, improving load time.
- Backups:
- UpdraftPlus: Performs automatic backups of your website and allows you to restore them easily in case of problems.
- Social media:
- Social Warfare: Allows you to add social sharing buttons with advanced customization options.
3. Guide to Manually Installing and Activating Plugins
In addition to installing plugins from the WordPress repository, you can also install plugins manually by downloading them from external sites and uploading them to your site. Follow these steps to do it:
- Download the plugin: Download the plugin .zip file from the official source or from the developer’s website.
- Upload the plugin: Go to «Plugins» in the WordPress admin panel and click «Add New». Then select the «Upload Plugin» option.
- Select file: Click «Choose File» and select the .zip file of the plugin you downloaded.
- Install and activate: Click «Install Now». Once installation is complete, click «Activate Plugin».
With these options, you can add advanced functionality to your WordPress website, improving its performance and adapting it to your specific needs. Make sure to keep your plugins updated to ensure the security and proper functioning of your page.

Creating Content and Essential Pages
1. How to Create an Effective Homepage
The homepage is the first impression visitors will have of your website, so it should be attractive and clear. Its main goal is to communicate the purpose of your site effectively and guide users to the most important sections. To create an effective homepage, follow these steps:
- Clear and relevant headline: Use a headline that grabs attention and briefly describes what you offer. It can be a slogan for your business or a short description of your services.
- Calls to action (CTA): Include buttons that direct visitors to other essential pages, such as «About Us», «Services», or «Contact». Use action-oriented phrases like “Learn more” or “Contact us”.
- Attractive visual content: Use high-quality images and videos that represent your brand or products. Images should be optimized for the web so they do not slow down page loading time.
- Reviews and testimonials: If you have positive customer feedback, display it on the homepage. This builds trust and credibility.
- Summary of services or products: Provide a brief and concise description of your main services or your winning products. Include links to more detailed pages for those who want to learn more.
2. Basic Pages You Should Not Miss: About Us, Contact, Blog, etc.
In addition to the homepage, there are other essential pages that should be present on any professional website:
- About Us: This page is essential for telling your company’s story, mission, vision, and values. Include information about the team, important achievements, and any other relevant data that helps build your brand identity.
- Contact: Make it easy for visitors to get in touch with you. Include a contact form, email addresses, phone number, and, if relevant, your business’s physical address. You can also add links to your social media profiles.
- Blog: A blog allows you to add content regularly, which is excellent for attracting traffic to your site and improving SEO. You can share news, tips, tutorials, or any content relevant to your audience and make money through affiliate marketing.
- Services or Products: If you offer services or products, create a dedicated page to describe them in detail. Be sure to include images, detailed descriptions, and, if possible, testimonials from satisfied customers.
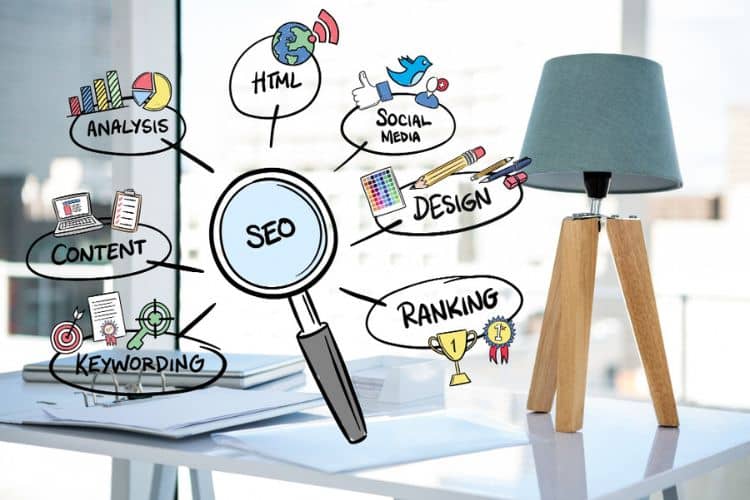
Strategies for Writing Search Engine Optimized Content (SEO)
Search engine optimized content is crucial for improving your website’s visibility and attracting organic traffic. Here are some strategies:
- Keyword research: Before writing content, identify the relevant keywords for each page. Use tools like Google Keyword Planner or Ahrefs to find terms with good search volume and low competition.
- Natural use of keywords: Insert keywords naturally in the title, subtitles, and throughout the content. Avoid keyword stuffing, as it can affect readability and penalize your site in search results.
- Meta descriptions and tags: Each page should have a unique meta description that summarizes the content in an engaging way and contains the main keyword. Use H1, H2, and H3 tags to structure the content and make it easier to read.
- Original and valuable content: Create content that answers your audience’s questions and needs. Make sure it is original and offers real value, as this will keep visitors on your site longer and improve your ranking.
By following these recommendations, you will be able to create a well-structured and optimized website, with quality content that attracts and converts visitors into leads and makes your project a growing business.

SEO Optimization for Your Website
1. Research Relevant Keywords
SEO optimization starts with good keyword research. The process consists of identifying the terms and phrases that potential users use to search for information related to your website’s content. To carry out effective research, follow these steps:
- Define the site’s goal: Before you begin, it is crucial to be clear about the purpose of your WordPress website. Do you want to attract customers, increase traffic, or educate your audience? This will help you focus your research.
- Use keyword tools: Tools like Google Keyword Planner, Ahrefs, or SEMrush allow you to find keywords related to your content. Look for terms with good search volume and low competition.
- Competitor analysis: Review the keywords used by your direct competitors. This will give you ideas about which terms are performing well in your industry.
- Choose long-tail keywords: Long-tail keywords (more specific and detailed phrases) usually have less competition and are easier to rank for. For example, instead of «clothing», use «eco-friendly clothing for children».
2. Optimizing Titles, Meta Descriptions, and URLs
Once you have your list of keywords, it is time to optimize each page on your site:
- Titles: Make sure each page has a unique and attractive title that includes the main keyword. The title should be clear, descriptive, and no longer than 60 characters to avoid being cut off in search results.
- Meta descriptions: Meta descriptions are short summaries of each page that appear in search results. They should be between 150 and 160 characters and include the main keyword. Although they do not directly affect ranking, a good meta description can increase CTR.
- URLs: URLs should be clear, concise, and contain the main keyword. Avoid using long URLs with too many numbers or special characters. For example, instead of «yoursite.com/p=123», use «yoursite.com/eco-friendly-clothing-children».
3. Using SEO Plugins Like Yoast to Improve Your WordPress Site’s Visibility
SEO plugins are essential tools for optimizing your WordPress website efficiently. One of the most popular is Yoast SEO, which offers a wide range of features to improve your site’s visibility:
- Installation and setup: Install Yoast SEO from the WordPress plugin repository. Once activated, follow the setup wizard to adjust your site’s basic SEO settings.
- Content optimization: Yoast SEO allows you to analyze each page and blog post, showing recommendations to improve SEO. You will see suggestions for keyword usage, internal and external links, content length, and more.
- Sitemap creation: Yoast SEO automatically generates an XML sitemap, making it easier for search engines like Google to index all the pages on your site. Make sure to submit this sitemap to Google Search Console.
- Readability analysis: In addition to SEO recommendations, Yoast also provides a readability analysis to ensure your content is easy for users to understand.
Implementing these strategies and using tools like Yoast SEO will help you optimize your website for search engines, improving its visibility and attracting more organic traffic.
Website Maintenance and Security
1. Importance of Regular Backups
Making regular backups of your website is an essential measure to protect your content and ensure that your page can be quickly restored in case of technical problems, cyberattacks, or human error.
A backup stores a complete version of your site, including the database, files, and settings, allowing you to restore the site to its previous state in minutes.
To automate this process, there are numerous plugins in WordPress such as UpdraftPlus and BackupBuddy that allow you to schedule automatic daily, weekly, or monthly backups. It is recommended to store these backups in external locations such as Google Drive, Dropbox, or an external server to ensure that even if your hosting fails, you can recover your website.
2. Updating Themes, Plugins, and the WordPress Version
Keeping themes, plugins, and the WordPress version updated is fundamental for the security and performance of your website. Updates not only improve functionality and add new features, but also fix vulnerabilities that could be exploited by hackers.
- Updating WordPress: Always use the latest version of WordPress to ensure your site is protected against the latest threats. WordPress automatically notifies you when a new version is available; you just need to go to «Dashboard > Updates» and click «Update Now».
- Updating themes: Regularly check whether the themes you have installed need updating. Go to «Appearance > Themes» and see if there is an update notification. This also applies to themes that are not in use, as they may contain vulnerabilities.
- Updating plugins: Like themes, plugins should be kept up to date. Go to «Plugins > Installed Plugins» and look for update notifications. Before updating a plugin, verify that it is compatible with the current version of WordPress and make a backup.
3. Tips to Protect Your Website from Attacks and Threats
Website security should be a priority to avoid malicious attacks, data loss, and damage to your reputation. Here are some tips to strengthen your WordPress website’s security:
- Install a security plugin: Plugins like Wordfence and Sucuri Security offer comprehensive protection against attacks. They can block suspicious login attempts, scan for malware, and monitor site activity.
- Use strong passwords: Make sure all administrator accounts use strong passwords that include combinations of letters, numbers, and special characters. Also, enable two-factor authentication (2FA) to add an extra layer of security.
- Limit login attempts: Configure your site to temporarily block users who repeatedly try to log in with incorrect passwords. This will help prevent brute-force attacks.
- Disable the file editor: The built-in WordPress file editor allows you to modify your theme and plugin code directly from the admin panel. Disabling it can prevent hackers from using it to inject malicious code into your site.
- Change the database prefix: By default, WordPress uses the «wp_» prefix for database tables. Changing it to something unique during installation or using a security plugin can make SQL injection attacks more difficult.
By implementing these maintenance and security practices, you will be able to protect your website and ensure its optimal performance, minimizing the risk of attacks and data loss.

Promoting Your Website
1. Strategies to Drive Traffic Through Social Media
Social media is a powerful tool for increasing the visibility of your website and attracting qualified traffic. To make the most of its potential, it is important to develop a coherent and planned strategy. Here are some recommendations:
- Choose the right platforms: Not all social networks are suitable for all types of websites. Identify where your audience is and focus on those platforms. For example, Instagram and Pinterest are ideal for fashion and design sites, while LinkedIn is better for business and professional content.
- Share valuable content: Regularly publish relevant and useful content for your audience. Share links to your blog posts, infographics, videos, and other resources that may interest your followers. Make sure each post is optimized with keywords and hashtags to increase its reach.
- Interact with your audience: Respond to comments, messages, and mentions from your followers. This not only improves engagement, but also strengthens the relationship with your audience, which can translate into more traffic to your website.
- Use paid ads: Platforms like Facebook and Instagram offer advertising options that allow you to target your audience very specifically. This helps you reach people who are likely interested in your content or products.
- Collaborate with influencers: Collaborating with influencers in your niche can significantly increase your website’s visibility. Look for influencers who share your brand values and have an engaged audience.
2. How to Use Email Campaigns to Connect with Your Audience
Email remains one of the most effective tools for connecting with your audience and promoting your website. Here’s how to make the most of it:
- Build an email list: Offer website visitors something valuable in exchange for their email through different email marketing tools, such as a free e-book, a discount, or access to exclusive content. Use subscription forms on your site and on social media.
- Segment your list: Not all your subscribers have the same interests. Segment your email list based on user behavior, interests, or location to send more personalized and relevant messages.
- Create valuable content: In your emails, offer useful and relevant content that provides value to your subscribers. This can include tips, industry news, blog updates, or exclusive promotions.
- Send regular newsletters: Keep your audience informed and engaged by sending newsletters regularly. Make sure each email has a clear call to action, such as visiting a new blog post or exploring a product.
- Monitor and adjust: Use analytics tools to measure the performance of your email campaigns. Look at open rates, click-through rates, and conversions to adjust your strategy and improve results.
Analytics Tools to Measure Your Site’s Performance
Measuring your website’s performance is essential to understand which strategies are working and which need adjustments. Here are some essential tools:
- Google Analytics: This free tool is essential for analyzing your website traffic. You can see where your visitors come from, which pages they visit, how long they stay on the site, and much more. Use this information to identify which content resonates most with your audience and which traffic sources are most effective.
- Google Search Console: It allows you to monitor your site’s performance in Google search results. You can see the keywords that drive traffic, the number of clicks, and impressions. It also alerts you to technical issues that may affect your site’s indexing.
- Hotjar: Hotjar lets you see how users interact with your site through heatmaps and session recordings. It is ideal for identifying areas for improvement in the user experience.
- Ubersuggest: In addition to keyword research, Ubersuggest offers traffic analysis and your site’s and competitors’ key performance metrics.
Implementing these strategies and using these tools will allow you to promote your website effectively, attract more traffic, and convert your visitors into leads.

Conclusion: Capitalize on Your Digital Business with WordPress
WordPress is a powerful and versatile tool for any online business looking to capitalize on its digital presence. Its flexibility and ease of use allow entrepreneurs and companies to create professional websites, from blogs and online stores to educational platforms and membership sites. With a minimal initial investment, you can turn your idea into a profitable digital business.
To maximize your site’s potential, it is crucial to focus on creating a solid strategy that integrates SEO-optimized content, an intuitive user experience, and an attractive design. Using specialized plugins will allow you to add advanced functionality, such as sales management systems, social media integration, and marketing automation, which are essential for scaling your business.
In addition, WordPress gives you the opportunity to monetize your site in various ways, such as selling physical or digital products, subscriptions, advertising, or even affiliate marketing. Keep your site updated and secure, and spend time analyzing its performance to adapt to your customers’ needs and the changing market.
With WordPress, you have a platform in your hands that can become the foundation of a successful and scalable digital business. Take advantage of its resources and features to capitalize on your venture and turn it into a sustainable source of income.
If you want to learn how to acquire already-built businesses and optimize them to maximize your profits, don’t miss our next article:«Is it profitable to buy a website to sell it? Notes on flipping«. Discover how you can leverage this strategy to achieve a significant return on investment. Click here to keep reading and boost your digital business!